Monday, December 30, 2013

Merry Krampus! (Part II)

THE KRAMPUS (Part II)


Sure, it's a little past Christmas, but I decided to do another Krampus drawing--This one is a little more on model.  Again, I thought it was more amusing to have him look like he decided to have his portrait done at the local K-Mart's Photo Center (it doesn't take much to amuse me, apparently).

Alas, after I had the drawing halfway finished I began to think it looked like something Ed "Big Daddy" Roth would have drawn.  I just needed to put Krampus in a dragster with a large gear shift and he would fit right in.

Krampus and Rat Fink -- Separated at Birth?

For those of you who are interested, here's the process:

* * *


STEP ONE:  I used vine charcoal to roughly draw out the figure on a 9" x 12" piece of Strathmore Gray Toned drawing paper.  I really like working on toned paper, as it gives three immediate values Light, Mid-Tone, and Dark, rather than just two (Dark marks on Light paper).

Once again, I didn't bother using a photo-reference this time, as I had just done about 8 hours of figure drawing throughout the week and felt I had this relatively simple portrait in the bag.  Of course, pride usually goes before the fall.  :-D

* * *


STEP TWO:  And, as I normally do, I smeared everything into a soft, blurry mess.  Usually, I do this to lay down some of the beginnings of where the shadows will go and to generally just keep the charcoal on the paper.  As vine charcoal is so soft and will smudge if touched, I find it better to smear it around to keep it on the page, ironically.

* * *


STEP THREE:  I then begin to use charcoal and carbon pencils to build up the darks and shadows within the picture and carve out highlights with a kneaded eraser to see where the light source will fall.  You may be surprised how much drawing you can do with an eraser.  :-)

 * * *


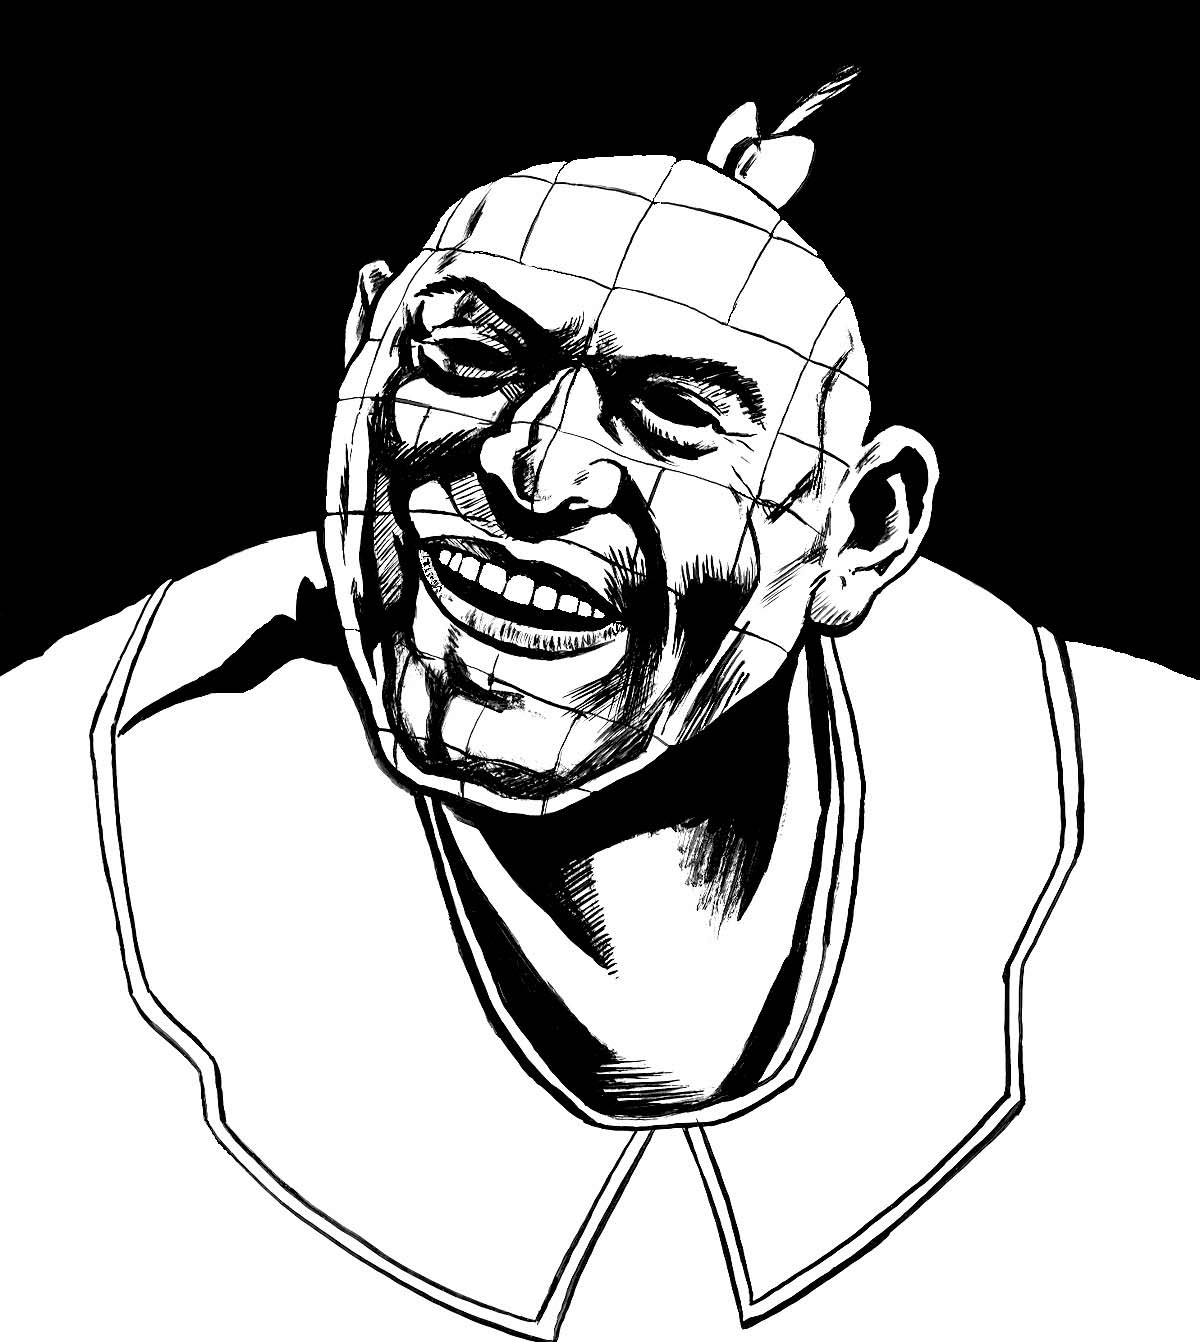
STEP FOUR:  I finished up the darks on the page.  In and of itself, the drawing is mostly OK as dark lines on mid-toned paper.  However, it is adding the white highlights which really make a drawing on toned paper "pop".

* * *


STEP FIVE:  I used a General's white charcoal pencil to add whites and highlights to the drawing.  The photo sort of fails to catch some of the subtle gradations, however, I was hoping it would show enough to demonstrate the big difference adding just a little highlight can make.  At this point, I just took a picture with my camera and imported it into PhotoShop to finish the drawing and begin adding color.

* * *


STEP SIX:  I decided to just finish the black-and-white portion in PhotoShop, since I would have to do the background and most of the finalized fur effects digitally, anyways.  For the fur, I used a brush which was included on the disc of one of the (many) "ImagineFX" magazines I have laying about the house; the brush consists of about a dozen or so dots of slightly differing sizes and line densities and give a really nice effect.

* * *


STEP SEVEN:  Over top the black-and-white drawing, I added a MULTIPLY LAYER to do most of the colorization, but also did some coloring overtop the drawing directly on a normal layer, as well--mostly for final highlights and areas that need a little more "brightness" to them.  At the end, I flattened all layers, did some minor adjustments to the levels, and called it "good 'nuff!" 

* * *

This was done with charcoal, carbon pencil, and white chalk on 9" x 12" Strathmore gray toned paper and digitally colored in PhotoShop.

.

Friday, December 20, 2013

Merry Krampus!

THE KRAMPUS


'Tis the Season for drawings of Santa's Little Helper, the Krampus.  Originally, I was going to a tripped out version, with his tongue out and all crazy.  But, I thought it would be more amusing to do a version of the Krampus as if he was just walked into the K-Mart Photo Center to have a portrait done.  I know, I'm a little off model for the Krampus--not nearly hairy enough and I kept his tongue in his mouth for the picture.  I figured it was funnier to have him seem like a middle-aged demon, balding, slight paunch, but just plugging away at his job.  :-)  I may have to do a corrected version of him in the near future.

Here is the process, for those of you interested...

* * *


STEP ONE I blocked everything in using vine charcoal on gray bogus paper (it's a step up from newsprint, but has more of a "tooth", which is really good for charcoal and such).  I didn't bother with a reference picture this time, as I had done quite a bit of figure/portrait drawing this week, so I thought I could handle it without this time.  :-)

* * *


STEP TWO I then smear it into a soft, blurry mess... Just to give an idea of where the shadows would fall and the light source, etc.

* * *


STEP THREE:  I begin to work on building up highlights by erasing out charcoal with a kneaded eraser and darken the shadows with a charcoal pencil and carbon pencil.

* * *


STEP FOUR:  More of the same.  I also add in some white chalk as an extra highlight.  The gray background is a good middle-tone--it's like getting three values for the price of two (dark, middle, light), rather than just the white and black of charcoal on white paper. 

* * *


STEP FIVE:  Here is the finished charcoal drawing.

* * *


STEP SIX:  I then scanned the drawing into PhotoShop and used a mix of the MULTIPLY Layer and standard layers to colorize it and do some minor painting.  

* * *

Done with charcoal, carbon pencil, and white chalk on 9" x 12" gray bogus paper, and then colorized in PhotoShop.

.

Thursday, December 12, 2013

Pinheads All The Way Down...

Pinhead - Pinhead - Pinhead Mash-Up


As part of the Halloween series of drawings, I intended to include Schlitzie the Pinhead from Tod Browning's movie, "Freaks", but just ran out of time.  I mentioned this to Todd, a chum of mine from work, and since he is a big fan of the movie he INSISTED that I had to do it!  He even suggested that I should do a mash-up of Pinhead from "Freaks" and Pinhead from "Hellraiser".  I decided to one-up that mash-up by also including Zippy the Pinhead from the "Zippy" comic strip by Bill Griffith, which is one of my favorite comic strips for its pop-surrealism.  (Zippy the Pinhead was also inspired by Schlitzie the Pinhead from the movie "Freaks", so it all comes full circle :-).

So, as Bill Griffith would say, "A tip o' the pen to Todd G."  Blame him (mostly) for this.

* * *


STEP ONE: Here are the pencils.  I did a real quick sketch from a screen cap of the movie.

* * *


STEP TWO: I did the inks using a No. 4 brush and India ink.  The head proportions in the pencils seemed a little... normalized, so I "fixed" that in the inks.  I intended to add the nails/pins for the Hellraiser Pinhead in Photoshop, as it seemed like there was too much to go wrong at that stage, and I wanted to be able to correct/remove them if worse came to worse and I goofed it all up.

* * *


STEP THREE: After scanning it in, I added the pins to the face.  I also realized that the collar for Schlitzie didn't quite read like Zippy the Pinhead from the comic strip as I originally intended.  I added Zippy's trademark collar into the picture, as well as the polka-dot muumuu.  I did sort of intentionally leave the line-weight the same for the collar and muumuu, so it would more closely resemble the comic strip.  But, I just wasn't sure about that decision...

* * *


STEP FOUR: I decided I didn't like the line weight being too much the same on the muumuu after all--the different art styles just clashed too much--and did what most artists would do in that situation: Blacked it all out.  I also thought it would add to the dramatic lighting.  :-)  I then colored the whole thing on a new MULTIPLY Layer and called it DONE!

* * *

Pen and ink on 8-1/2" x 11" card stock and digital coloring in Photoshop.

.