Sunday, February 9, 2020

Unwanted Valentines: Invasion of the Body Snatchers (1978)

Unwanted Valentines:
Invasion of the Body Snatchers


This is an Unwanted Valentine's Day card based on the 1978 movie, "Invasion of the Body Snatchers".  Not only did I watch the movie growing up, I even read the book back in the day when I was on a bit of a kick reading classic sci-fi novels and short stories which was turned into movies.

As a youngster, stories involving Body Snatching/Body Replacement/Body Swapping filled me with an existential dread (and still do on a residual level, I guess).

* * *


STEP ONE: Here are the digital pencils--quickly scribbled on the Blue-Pencil Layer I setup in Clip Studio Paint on a 1,500px by 2,100px canvas at 300dpi.  Alas, these pencils look more like Gene Wilder in "Young Frankenstein"--so, it was off to a less than ostentatious start.

I also left the lettering in on the pencilled step, along with the hand-lettered/scribbled "AHHHHHHHHH!!", with a Clip Studio Paint layer effect that puts a black line around everything drawn on the layer.

* * *


STEP TWO:  And here are the digital inks, done mostly with a 7pt brush.

* * *


STEP THREE: Coloring was done over top the digital inks on a Multiply Layer.  The resolution was dropped to 200dpi, so the canvas re-sized to 1,000px by 1,400px.

* * *

Done digitally with Clip Studio Paint on the iPad.

.

Tuesday, February 4, 2020

Unwanted Valentines: V for Vendetta

Unwanted Valentines:
V for Vendetta


It's time again for "Unwanted Valentines"!  Y'know, those super-nerdy/horrifying Valentine's Day cards "normal" people would be uninterested and/or repulsed to get and have no wish to receive.  If you give it to a fellow Nerd, you may actually get a smirk or mild chuckle.  So, good luck with that...

This one is obviously from "V for Vendetta".  I read the comic series as it came out in America in the later 80's, published by DC Comics (yeah, I know it was published in "Warrior" magazine, but I didn't really have access to the series at that time).  It was one of my favorite comic series at the time, and is still in my personal Top 10-to-20 comics of all time.  The movie was generally enjoyable, but the comic book series had more to it, methinks (although, there were a few bits of coolness in the movie, which was a generally solid adaptation).

Also, I do get a chuckle out of seeing Guy Fawkes masks from "V for Vendetta" used in protest movements: Another case of fiction intruding into reality.  Theoretically, I generally support that.

* * *


STEP ONE:  Here are the digital pencils--quickly scribbled on the Blue-Pencil Layer I setup in Clip Studio Paint on a 1,500px by 2,100px canvas at 300dpi.

* * *


STEP TWO:  And here are the digital inks, done mostly with a 10pt brush and the Symmetry Tool.

* * *


STEP THREE:  Coloring was done over top the digital inks on a Multiply Layer, as well as a Lighten Layer overtop.  After it was finished, I dropped the resolution down to 200dpi, so the canvas re-sized to 1,000px by 1,400px.

* * *

Done digitally with Clip Studio Paint.

.

Friday, January 31, 2020

Cover Replica: Batman - Harley Quinn #1

Harley Quinn #1


Here's the original "Batman - Harley Quinn #1" cover by Alex Ross.

* * *


And here is here's the cover replica for my pal (and Superman's), Jim, from Jimmy Jams Comics and Games in Winona, MN and La Crosse, WI.

It's been a while since I did one of these replicas... or, is it more accurate to call it a forgery?  Well, I guess I can kinda-sorta justify it as one of those "Master Reproductions", except with Alex Ross cover painting in this case rather than a Da Vinci or Michelangelo.  I also cheated a little bit and enlarged the figures of the painting and left off the logo (I still **HATE** lettering).

* * *


STEP ONE:  I cut a 20" x 30" piece of hardboard, and then glued a 22" x 30" sheet of Stonehenge (#140) paper using acrylic medium, and trimmed the excess paper after it dried.  I then used a mixture of gesso and acrylic medium to paint over top of the Stonehenge paper to prep it for painting.  When that was prepped, I drew a 1" x 1" grid and set to penciling the cover image.  For the pencils, I used a blue lead .07 mechanical pencil to keep the lead from smearing too much.

* * *


STEP TWO:  Here's the first pass with the acrylic paints.  I decided to go more with slightly more colorful version of Harley Quinn, rather than just black/gray and red.

* * *


STEP THREE:  And here is the finished piece--after another 2-to-50 more passes.  I will admit it is a little bit weird and tricky trying to mimic a watercolor/gouache painting with acrylics.  As usual, my camera didn't do the best job; since the painting is so large it is a bit difficult to get the lighting to be uniform from top-to-bottom without sacrificing detailed shading.  In this case, I did the best to split the difference.  Oh, well...

* * *

This was done with acrylic paint on 20" x 30" gessoed Stonehenge paper glued to hardboard.

.

Sunday, January 12, 2020

Shameless Self-Promotion: They Live Tattoo

"They Live" Tattoo


And here is the original image...


As a joking shout-out to a friend, Joel, I did up a caricature of of him as an alien from "They Live".  Then Joel no doubt had some sort of break with reality and decided it would be a good idea to have that image tattooed on his leg.  It was the end of 2019 when he did it, so who can blame him, I guess?  And, believe it or don't, it isn't the first time I've had someone put my art on their body as a tattoo.

I am always conflicted when it comes to something like this...  On the one hand (or leg, in this case), it **IS** really cool to have one's art represented as part of a "Permanent Collection", if you will.  On the other hand (er, leg), it is a mostly permanent part of someone's body, so having my art be a part of that seems like a terrible idea--bordering on irresponsible!  Then again, Joel has said he is a fan of my work, so his decision-making ability is already sketchy at best, so what did we all expect?  Tsk, tsk!

Seriously, it is an honor to have someone consider my art as a tattoo.  I will also admit it is somewhat strange and baffling (as well as a boost to the ol' ego) that someone would like my art enough to get it permanently placed on their own body.  So, that's kinda weird and surreal to think about, too.

In closing, if anyone else has a tattoo, or has used my art someplace, lemme know.  I'm enough of an egomaniac to want to see it--and maybe even show it off on my meager Blog!  :-)

THANKS for the pic, Joel!

.

Wednesday, January 1, 2020

Happy New Year 2020!

Happy New Year!


Hey, my first posting of the new year!  And it's on New Year's Day and everything!

OK, this is probably cliche at this point.  But, I figured what better, nerdier way to ring in the New Year (and new decade for that matter) than having Old Man Time and Baby New Year replaced with old man Yoda and, well, Baby Yoda?

Of course, it is also tempting to just have Yoda's eyes bugged even more than usual on the "Maury Povich" show next to Yaddle, with the exclamation "You **ARE** the father!"  But, I'm sure that's also been done a million times already.

I just want to take a few moments to say THANK YOU to everyone who has stopped by to gawk at my meager drawings and dabblings, and a few brave souls who even chosen to follow my Blog, and/or even comment on some postings.  It is so greatly appreciated!

Here's to hoping the year 2020 doesn't just look good in hindsight!  After all, they say hindsight is 20/20, so who knows?  Best wishes to all!

* * *


STEP ONE:  Here are the digital pencils, done in Clip Studio Paint on a 1,500px x 1,800px canvas at 300dpi.  For both of these, when finished, I Single-Layer Export as a .jpg and reduced it to 1,000px x 1,200px.and 200dpi.

* * *


STEP TWO:  And here is the digital painting that was also done in Clip Studio Paint.  This time around, I thought I'd try to keep it digitally painted, rather than just doing the digital pen-and-ink and then coloring it as I normally seem to do.  I dunno.  The results are... mixed.  Try, try again, I guess.

* * *

Done digitally in Clip Studio Paint.

.

Tuesday, December 31, 2019

Bizarro Year in Review: 2019

2019 Year in Review
By Bizarro


OK, who better than Bizarro to explain I have absolutely no idea what to make of 2019.  The year for me has been, well, Bizarre-Oh.  It has whipsawed back and forth between "Hey, that's good!" to be almost as quickly followed by "Oh, that's bad!"...  Like this clip from "The Simpsons", which is good!  It will probably be taken down for a DMCA Violation, which is bad...


There have been the usual retinue of personal triumphs and the high highs; only to be tripped up almost immediately with some personal disaster and low lows.  Some new, close friends I've made along the way, along with close friends I failed to keep in touch with nearly as often as I wished I had (sorry!  I'll do better this coming year, promise!).  To quote "The Simpsons", again: It was the best of times, it was the BLURST OF TIMES?  You stupid monkey!"


It was particularly strange weather-wise.  The winter was very mellow right up to February, when it decided to dump about 3 feet of snow in a month.  That was a LOT of shoveling for yours truly, as it was higher than the maw on the snowblower many days.  All that snow caused some minor flooding (it was just starting to work it's way into our house before I was able to shovel a pathway for the snow and slush and semi-frozen water away from the house...).  Also, with all the crazy snowstorms in Central Wisconsin, for the first time in my life I was snowed in at work.  Since I was there already, I helped out with some of the coordination going on for clean up and such and worked a 32 hour shift.  So, that was interesting, too, just to say I did it.  No, I don't really want to do that again.

Then, in July, there was a massive storm in Central Wisconsin which knocked out power for up to 7 days in some areas (we're talking within city limits, not way out in the middle of nowhere... well, as much of a city limit as Central Wisconsin has, of course).  Amusingly enough, I had just finished my shift at work and drove right through the middle of the storm that knocked over too many trees to count and power for almost a week.  You know it's bad when Wal-Mart had to close for two days.

Then there was an assortment of projects I did of which I was relatively proud, and a ton of other things which I had planned, but never got around to finishing, alas.  I also set a personal record with the number of posts I made this year--most of which were due to my dumb idea about the "31 Days of Hell-O-Ween": a daily posting, done mostly without a net.  Somehow, it worked and I still have no idea how.  But, here's to hoping I post even more next year.  I have plans for a few longer form posts, so we'll see about that and burn that bridge when I get to it.

Here's something strange to me: Whenever there is a video that involves the Celestials from Marvel Comics, my drawings from this Blog have a 50% of showing up in the video.  So, that's kinda cool to see my work show up in strange places.  Too bad they don't know it's from me, but oh, well.  Which reminds me... I will finally have get around to doing some cool drawings and painting involving Celestials.  I was always a fan of Kirby's "Eternals", and with them showing up on the big screen soon, I may have to jump in front of that parade.

Overall, I'm still trying to piece together what the H-E-Double Hockey Sticks this year was about.

Oh, well, here's to hoping 2020 is, well, a perfect vision.

* * *

Done digitally with Clip Studio Paint.

.

Tuesday, December 24, 2019

Merry Sithmas - Emperor Palpatine

Merry Sithmas
Emperor Palpatine


Hey, I managed to sneak in another Sithmas Card!  This time, it's Emperor Sheev Palpatine (yes, his first name is "Sheev".  I Sheev you not...).  Since he kinda went nuts with the Force Lightning in "Star Wars: Episode IX: The Rise of Skywalker", this image popped into my head as a possible idea for a Sithmas Card.  And here we are...

* * *


STEP ONE:  Here are the digital pencils, done in Clip Studio Paint.  It is a 1,000px x 1,400px document at 200dpi.

* * *


STEP TWO:  And here are the digital inks, also done in Clip Studio Paint.  I left large chunks in plain black, since the Force Lightning would cover most of the area and need more contrast to better stand out.

* * *


STEP THREE:  The color was done with a series of layers in Clip Studio Paint, with two different layers used for the lightning for the animation.  Then it was imported into Photoshop to animate two frames and exported as an animated .gif.

While I was coloring the drawing, I realized a little too late that I hadn't properly done the lighting from where the Force Lightning would be flashing.  I fudged it a little bit, and it MOSTLY works, but is not entirely correct.  Sigh...

* * *

Done digitally in Clip Studio Paint and Photoshop.

.

Sunday, December 22, 2019

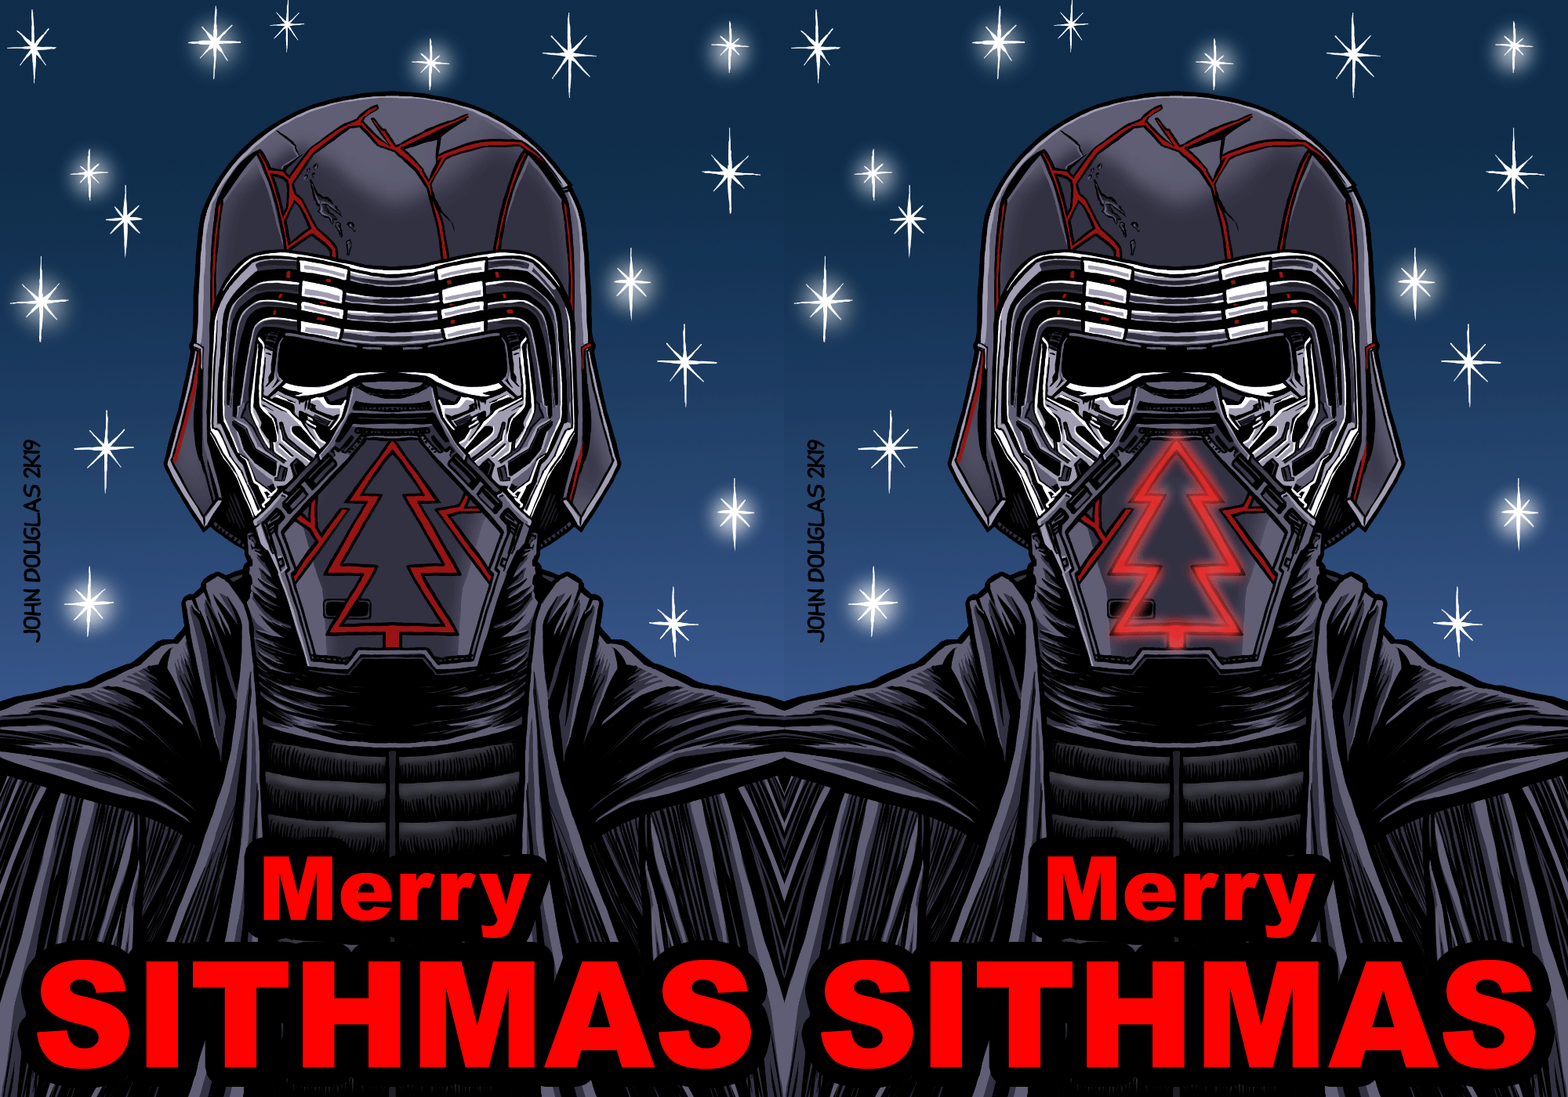
Merry Sithmas - Kylo Ren (Star Wars: The Rise of Skywalker)

Merry Sithmas
Kylo Ren (The Rise of Skywalker)


When I saw Kylo Ren's repaired helmet in "Star Wars: The Rise of Skywalker", this was the first image that appeared in my head for a new Sithmas Card.

* * *


STEP ONE:  Here are the digital pencils, done in Clip Studio Paint.  It is a 1,000px x 1,400px document at 200dpi.

* * *


STEP TWO:  And here are the digital inks, also done in Clip Studio Paint.

* * *


STEP THREE:  The color was done with a series of layers in Clip Studio Paint, then it was imported into Photoshop to animate two frames and exported as an animated .gif.

* * *

Done digitally in Clip Studio Paint and Photoshop.

.

Thursday, December 19, 2019

Merry Sithmas - Knights of Ren: Scythe Warrior

Merry Sithmas
Knights of Ren: Scythe Warrior


Hey, it's time for a Sithmas Card!  What's that--Daft Punk is a Sith Warrior?  Actually, this time, it's one of the Knights of Ren: Scythe Warrior (also, The Rogue).  Darned if I can find a more accurate name at the moment--although, I'm sure they will officially release it just after I post this...

The Knights of Ren caught my interest in "Star Wars: Episode VII: The Force Awakens", and appeared in the trailer for "Star Wars: Episode IX: The Rise of Skywalker" (which I plan on seeing this evening--just 'cuz I'm a nerd).

* * *


STEP ONE:  Here are the digital pencils, done in Clip Studio Paint (formerly MangaStudio).  It is a 1,000px x 1,400px document at 200dpi.  Frankly, the pencils above aren't all the good, or close to the finished image.  But, I include them so people can see how much things can change, as well as the actual work involved in finishing a drawing.  They don't all come out immediately correct, but also can need some work.  Like this one.  The helmet is wide and a little short at the top of the head, for example.

* * *


STEP TWO:  And here are the digital inks, also done in Clip Studio Paint, as I find the ink brush engine superior to all other programs I've tried.

* * *


STEP THREE:  The color was done with a series of layers in Clip Studio Paint, then it was imported into Photoshop to animate two frames and exported as an animated .gif.

* * *

Done digitally in Clip Studio Paint and Photoshop.

.

Thursday, October 31, 2019

Day 31: It Ends! - 31 Days of HELL-o-Ween 2019

31 Days of HELL-o-Ween 2019
Day 31: It Ends!


Boo!  HAPPY HELL-O-WEEN!

Well, here it is: The End.  I actually was able to post every day and made it, somehow!  No one is more surprised than yours truly about this (mostly) working out.  There were several times as to when I just wasn't sure I would make it to the end without dropping the ball a few times, but I guess that's part of why it is called a challenge.

Originally, I had planned to do it much more as quick sketchbook drawings.  Y'know, 30 to 60 minute drawings and painting to post on the blog.  But, the amount of time I spent on the drawings and paintings kept incrementing upwards--expanding to fill the remaining time.  Also, some of the first few I did turned out better than expected, so it built more of a personal expectation of quality I felt I had to keep.  It almost bit me in the arse more than once.

THE GOOD:  Shockingly, I was able to do a posting every day.  So, just that amount of work so relatively quickly was great for learning what techniques worked for me.  I also really improved my inking style, IMHO.  And, I think it also taught me to stop being so precious with my drawings; it's better to just do a bunch of drawings, no worrying how they will turn out, rather than thinking each one must be perfectly crafted before posting it.  Don't let perfection be the enemy of the good, as some have said.  Now, I just have to learn to consistently follow that for myself, too.

Also, some of the drawings and paintings actually turned out far better than I would have expected: Nosferatu, Frankenstein, Bela Lugosi, The Invisible Man, The Mummy, The Metaluna Mutant, Reagan "Possession" cartoon, Christopher Lee, Pumpkinhead, Trick 'r Treat, and Pennywise all seemed to turn out all right.

Oh, and thanks to this dumb stunt, this will be the most I've posted in a year on this Blog.  So, there's that, I guess.

THE BAD:  Some of the postings are just OK.  Minor things about the drawing/painting bug me and I wish I had fixed them before they were posted:  The Wolfman just isn't quite up to snuff; the head on the Saucer Man should have been more bulbous and rounded like a light bulb; The Man From Planet X should be a little better; while I liked the scratchboard effect for the "Night of the Living Dead" is nice, the hair on the zombie girl could be better drawn; the nose on the Brain Gremlin bothers me--the bottom of the nose is a bit too rounded and I kinda want to fix it; and the Charlie Brown ghost seemed a lot better in my head than it turned out.  Sigh...

Also, this time around, I think I stuck a little too closely to references and to the movies, rather than recreating the monsters or inventing my own.  But, once I started down that path, it was difficult to change the direction.  Mayhaps next year...

THE UGLY:  A few of these didn't turn out nearly as well as I would have wished.  For example, I really didn't care much for a couple of the "Plan 9 From Outer Space" drawings: Vampira's face is a little messed up, and Eros just doesn't look quite right.  Also, I didn't care much for my Benning posting from "The Thing"--it's OK, but just not as good as I would have liked (I think I should have thrown some watercolor over top, rather than just left it as colored pencil).  Bleh.  But, since I needed a posting, it went up anyways.  Oh, well.

I also had several times in October when something came up and I wasn't sure if I would be able to get the drawing done, so there were some moments which went from light concern to mild panic.  Also, as mentioned above, many of the drawings took more time than I planned.

* * *

Sincerely, if I may take a moment, thank you to all who stopped by to gawk--even those of you who were hoping to see a metaphorical car wreck.  I think I'll try this again and may actually plan things a little more, rather than flying by the seat of my pants the entire time.  I'll burn that bridge when I get to it...

This was done digitally in Art Studio Pro on an iPad Pro over top the first posting for "31 Days of Hell-o-Ween".  So, we end back where we began: with a parody of "Young Frankenstein".  And, yeah, it captures pretty much how I feel at the end of this whole, dumb idea.  Here's to the dumb idea next year, too!

* * *


* * *

This was done digitally in Art Studio Pro on an iPad Pro.

.

Wednesday, October 30, 2019

Day 30: It's the Great Pumpkin, Charlie Brown - 31 Days of HELL-o-Ween 2019

31 Days of HELL-o-Ween 2019
Day 30: It's the Great Pumpkin, 
Charlie Brown!


Hey, it's Charlie Brown's ghost--in this case, he's a REAL ghost!  He had trouble with scissors... and he got a rock!  Oh, darn it, I should have included some rocks around the ghost.  Oh, well.

This was supposed to be an easy one to do--a simple cheat.  Y'know, done in about 30 minutes... maybe an hour at most.  Instead, I updated to Painter 2020, so there was a lot of trying to get used to new brushes and whatnot.  I didn't even think to capture pics of the progress, so none of that for today.

Yeah, I'm a little slow sometimes... :-S

* * *

Done with Painter 2020.

.

Tuesday, October 29, 2019

Day 29: Pennywise - 31 Days of HELL-o-Ween 2019

31 Days of HELL-o-Ween 2019
Day 29: Pennywise


One of the creepiest parts of "It: Chapter One", is when the extra-dimensional creature going by Pennywise, splits open his face and shows the Deadlights.

This was done with watercolor/gouache on 8-1/2" x 11" toned cardstock.  The teeth were a pain in the butt and I had to paint them several times to get it near to right.  It's still not quite right, but right enough, I guess.  When it was finished, I used the airbrush in Photoshop to give it more of a glow for the Deadlights.

* * *


* * *

This was done with watercolor/gouache on 8-1/2" x 11" toned cardstock.

.

Monday, October 28, 2019

Day 28: Hellraiser Cenobite (Chatterer) - 31 Days of HELL-o-Ween 2019

31 Days of HELL-o-Ween 2019
Day 28: Hellraiser Cenobite (Chatterer)


Today's posting is a Cenobite from the "Hellraiser" series, Chatterer.  I've already done Pinhead last year (or was it the year before?), so thought I should choose one of the less well-known Cenobites.  I liked the first "Hellraiser" movie, and the sequel was generally pretty good.  I kind of fell out of the franchise after that, but found the Cenobites to be visually interesting.  Also, I was a fan of Clive Barker's writing as a teen--alternating between him and Stephen King.

Below, I quickly scribbled some pencils onto some toned cardstock, which was then sprayed with a casein fixative.  After that, I laid down a quick wash of watercolor/gouache, and then worked at it some more.  Over top, I added some pen-and-ink with a brush (I had done the opposite on previous drawings, with pen-and-ink first, then watercolor over top--this time, I did the opposite).

I did some Photoshop trickery this time around and merged the faces of Step two (with about 40% opacity) and three together, which added a warmth to the layer, and knocked down some of the harshness caused by the scanner.  I've included both so you can see the difference.

* * *


* * *

Done with watercolor/gouache and ink on 8-1/2" x 11" toned cardstock.

.

Sunday, October 27, 2019

Day 27: Gremlins 2: The New Batch - 31 Days of HELL-o-Ween 2019

31 Days of HELL-o-Ween 2019
Day 27: Gremlins 2: The New Batch


OK, here's where I admit I find "Gremlins 2: The New Batch" to be vastly superior to the original.  I am a sucker for any meta-fictional take downs and satirical biting of the hand that feeds you.  "Gremlins 2: The New Batch" is a chaotic funhouse from beginning to end, featuring Leonard Maltin being strangled with film stock during a movie review of "Gremlins", Hulk Hogan yelling at the Gremlins to quit ruining the movie, and Phoebe Cates beginning to re-tell the story of why she hates Christmas as the camera pans away as if even it has heard the story a few too many times.

This is Brain Gremlin, voiced by Tony Randall.  A learned, erudite, maniac with a gun.

After shooting a fellow Gremlin with a pistol:
“Now, was that civilized? No, clearly not; fun, but in no sense civilized”
- The Brain Gremlin

Below are the quick, digital scribble, the digital inks, and the colors done on a Multiply layer.  Done digitally in Clip Studio Paint on the iPad Pro.

* * *


* * *

Done digitally in Clip Studio Pain on the iPad Pro.

.

Saturday, October 26, 2019

Day 26: They Live - 31 Days of HELL-o-Ween 2019

31 Days of HELL-o-Ween 2019
Day 26: They Live


This one is for another pal of mine, Joel.  He wanted to be one of the aliens in "They Live"... and, vaguely, that's what he gets to be in this drawing!  Very, very vaguely.  I put him in a business suit, so he may not be completely recognizable (Kidding!).  :-P

"They Live" is right up there with "The Thing" as one of my favorite John Carpenter horror/sci-fi movies.  Fun sci-fi action, sending up Consumerism and Capitalism gone amok with subliminal advertising and aliens buying and selling us.

Done using Clip Studio Paint on the iPad Pro.

* * *


* * *

This was done with Clip Studio Paint on the iPad Pro.

.